Pool Server Setup
Helpful Skills
Running a pool server will require some advanced technical knowledge. The following are some of the skills that may be required in running a successful pool server:
- General docker understanding. ( https://docker.com )
- Running commands on the command line. This could be Windows or Linux.
- Understanding of general networking, firewalls, and internet router configurations.
- Looking at logs of data events to help with troubleshooting.
Before Starting
Before starting the setup process you might want to check to make sure your network supports port forwarding natively. To do this, start by finding your public IP address. Most search engines like Google will provide this information if you search "What is my IP?".
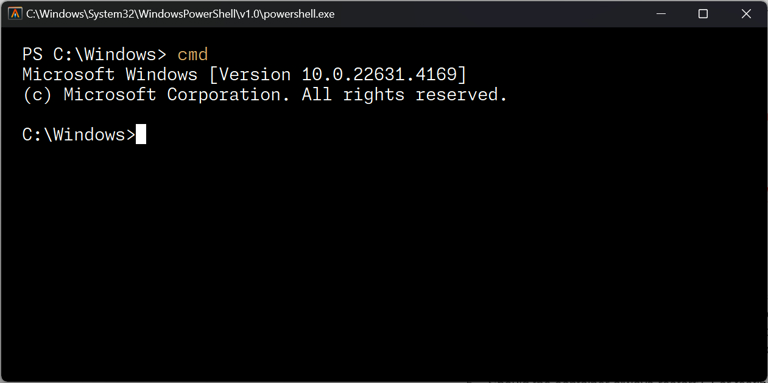
Next, open your command prompt (cmd on Windows). Type the command tracert X.X.X.X replacing the X's with your public IP address. Trace route (or tracert) will show the "hops" from your location to another IP address. If there is only one "hop" or line then you should be able to use port forwarding. If you see more than one "hop", then you should contact your ISP before proceeding.
Example:
tracert [your_ip_address]
Expected Result:
1 <1 ms <1 ms <1 ms 199-119-153-199-119-153-27.cpe.sparklight.net [199.118.152.28]
(the numbers don't matter, but you should only have 1 line)
Create Pool Server Config
If the player is a node owner, then they should be able to see a section in the UI for managing their pool servers. Click on the link to manage pool servers, and click “Create Pool Server”.
Enter the name of the pool. The name of the pool should be a concise description of the pool. This is especially important if the player will likely be running multiple pool servers and even running one or more public servers.
Once the pool server is created, a secret access key will be presented. This key will be used in running the pool server. This is how the pool server software will know its configurations and provide performance information for its nodes that will yield rewards. Store this key in a safe place.
Refreshing Pool Server Access Key
The pool access key does need to be kept secret, but if there is any reason that a node owner suspects that the key has been compromised, go to the pool management section of the player account. Click to see the details of the pool server in question. Click on the button to refresh the access key. The access key will be shown one time only. It is recommended that the access key be replaced in the docker-compose.yml configuration immediately since the old access key will no longer work. Once the configuration is updated, restart the docker container with the command:
docker compose up -d
Delegate File Node
The last step in creating a new pool server is to delegate a node. It is possible to run a pool server without a node. However, no work will be allocated to the pool unless at least one node is delegated to the pool.
In order to delegate a node, go to the Node section of the player account, and choose a node that has not been delegated. Click the button that says delegate node. When a dialog box appears, it should allow the selection of available pools. Choose a pool and click OK.
Installing Docker
Docker is the chosen technology to roll out the pool server technology. This was chosen for several reasons:
- Isolation: docker runs containers that will not allow host applications to affect the container and the container cannot negatively affect the host applications.
- Ease of configuration: Most of the setup and configuration is done when the image is created. To containerize the image, only a few variables need to be set to get the docker to work as expected.
- Platform choice: Docker can run on Windows, Linux, and Mac. It can also run on many NAS devices and on many cloud servers. Note: Infinity Rising will not test every platform. Stick with Windows and Linux for the best support. We will not prevent the images to be run in other configurations. However, watch your performance metrics!
Windows
Running docker on Windows is best facilitated using Docker Desktop. Use the following URL to download and install the tool. If you are new to docker, there should be a lot of information available to give you confidence that it is a safe and useful tool.
https://www.docker.com/products/docker-desktop/
Docker Desktop will run on Linux and Mac. Follow these instructions for Mac and Desktop Linux.
Linux
Running docker on Linux might be a little more complicated. It is possible to run Docker Desktop on desktop Linux. However, these instructions will focus on a command line installation of Docker Engine. Think of this as the “server” approach. These instructions will help to deploy to home Linux servers and cloud servers. Obviously, there are many distributions and versions of Linux, and this document is not meant to be exhaustive. Instead, refer to the docker documentation for latest information on installing docker engine.
https://docs.docker.com/engine/install/
Once the installation is complete, running the command below should return an empty set of running containers:
docker ps
Creating Public Access
Creating public access to a pool server might be the trickiest part of this setup. It is important to make this right because it might open up your private network to the public Internet. Do this at your own risk. Also, please only forward necessary ports to your internal host. Redirecting all Internet traffic to an internal host is NOT recommended. (Some routers may have this option)
- First, determine the public port number. If running behind a NAT (like at home), configure port forwarding for port
8001/tcpon the router. - The port should be forwarded to the internal IP address that the pool server is running on and port
8001/tcp.- Example: configure
8001/tcpon the router to forward to192.168.1.22:8001/tcp.
- Example: configure
- Some networks may change the internal IP address unexpectedly, so it is best practice to configure the internal host to have a static IP address.
The IP address and ports may differ in various configurations, and the pool server configuration should be able to accommodate many different configurations.
If running in the AWS cloud, configure the security group to allow tcp access to port 8001/tcp.
The following are some videos that might help setting up a port forward:
Choosing Cache Storage
Choose a location on the computer that can hold all of the cache files. Here are some of the considerations:
- Which drive contains enough free space? There could be **100G** of cache files as the project starts getting up to speed.
- Drive speed can be important. NVMe drives are much faster than spinning disks. Using a spinning drive might make the most sense for capacity, but note that the validation of cache files will take longer on these drives. This will not be a long term issue because it is on the roadmap to fix.
Now that the cache folder is chosen, the container can be started.
Starting the Container
There are various ways that the container can be managed. A long command on the terminal or creating the container in the desktop application are both options that have been considered. The long command is too error prone, and believe it or not, the desktop creation of the container is cumbersome and error prone as well. Docker Compose is the strategy that is the best solution for giving and receiving instructions for how to run this container. How about some terminology?
- Docker Image: An image is the template for which a container will run. All of the software and dependencies have been packaged up and downloaded as an image.
- Docker Container: A container is an image that has been run. Once an image has been run, it creates a state, and that state is stored as a container. If a new image is available, a container needs to be recreated in order to take advantage of the updated image.
- YAML: Docker compose uses a file called
docker-compose.yml. Call this the docker compose file or the YAML file.
Before starting the container, take a look at the variables that need to be updated. These variables will be in the docker compose configuration file, and can be changed easily.
Environmental Variables
| Variable | Value | Description |
|---|---|---|
| FILENODES_POOL_API_URL | https://filenodes.api.conucopiasweb.io | Not Recommended: This is the hostname that will be used to receive instructions. The hostname will change when moving from staging to production, for example. |
| FILENODES_POOL_ACCESS_KEY | Unique key | Each pool server will have its own unique key that authenticates and authorizes it for participation. |
| FILENODES_POOL_PUBLIC_PORT | 8001 | Public port used for client access to cached files. |
| FILENODES_POOL_PUBLIC_HOST | None | Not Recommended: Use only if the IP is not determined correctly by the filenodes service. |
| FILENODES_POOL_PUBLIC_PATH | cache | Not Recommended: Use this to change the base URL path to access cached files. |
Docker Compose Configuration
The following is an example docker compose configuration. Please create a folder on your computer that will have plenty of free disk space (100G-250G), and create the file docker-compose.yml. Copy and paste the template below, and carefully update the access key, public url, and cache path. Save the file and move to starting the container.
Step by Step Docker Configuration
-
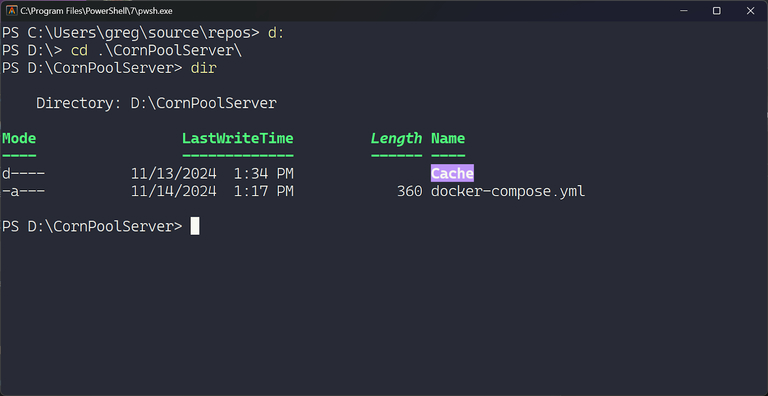
Create a working folder. For example:
D:\CornPoolServer.- Open up explorer to where you would like to create your working folder.
- Right click in the open space and select New → Folder.
- Name your folder then hit enter.
- Double click on the folder to go into that newly created folder.
-
Create a folder inside that folder for the pool server cache. For example:
D:\CornPoolServer\cache- Right click in the open space and select New → Folder.
- Name your folder (
cache) then hit enter. - Do not double click on this folder for the next step. In the future, you may navigate to the folder to watch all of the cache files being created.
- Use a text editor or notepad to create a
docker-compose.ymlfile inside the working folder. For example:D:\CornPoolServer\docker-compose.yml. Note: If using Notepad you will need to “Save As…”, then select “All Files” and make sure the file name ends in.yml. - Copy and paste the docker compose template below into the
docker-compose.ymlfile. Note: indentation and spacing matter. - Should the container always restart? For testing or manual management, change the
restartvalue tono. - Update the access key. Copy and paste the access key that was provided.
- Ensure that the public port matches your router’s port forward.
- Configure the cache folder. Update the path mapping to the internal docker path with a filesystem path. Example:
D:\CornPoolServer\Cache:/cache.
Sample docker-compose.yml with cache configured to path
name: Infinity Rising
services:
  pool-server:
    image: public.ecr.aws/Infinity Rising/nodes/pool-server:latest
    ports:
      - "8001:8001"
    restart: unless-stopped # if you want to manually start the pool server replace “unless-stopped” with “no”
    environment:
      FILENODES_POOL_ACCESS_KEY: <PASTE ACCESS KEY HERE>
      FILENODES_POOL_PUBLIC_PORT: 8001
    volumes:
      - D:\CornPoolServer\Cache:/cache
Starting Docker
- Open PowerShell or cmd.
- Change to working folder.
- Start pool server using the command:
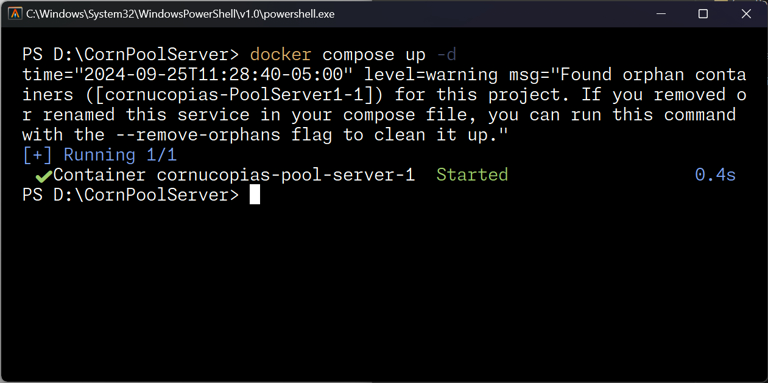
docker compose up -d